Pinhole Camera.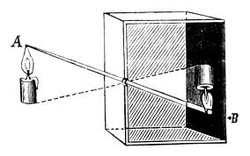
What is a PInhole camera?
A pinhole camera is an extremely simple and small camera. It consists of a light proof box or object, some sort of film and a pinhole made in the centre of one end of the object. LIght from the outside of the box passes though this single point the exposure times vary from a few seconds to months, and projects the image on to the opposite side of the box but the image has been been flipped upside-down. How to make a Pinhole camera... |
Heres how to make a PInhhole Camera with a matchbox:
|
Ingredients: - 1 x container (e.g hot chocolate tin, coffee tine ect) - 1 x sharp knife or drill - Black Gaffa/Duct tape - A very thin, sharp pin - Black matt paint and a brush (or black spray paint) - Aluminium foil (tinfoil) - A pair of scissors (optional).
|
Step one:
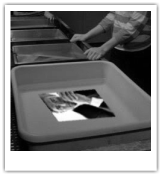
Get your tin or container and paint the inside and the lid of it black. This may need more than one cot of paint to insure it is completely light proof. You may also need to paint the outside of your tin. Step two: Cut a hole in the tin about half way up in the shape of a square or large circle , that is about 2cm each side. Step three: Cut a 2.5cm square piece of tinfoil. Then, using a pin, create a very small hole in the centre of the square. Try to make the hole as small and as sooth as possible. Step four: Attach the tin foil square to the inside of the tin, making sure the pinhole is over the cut out square or circle, securing it with tape. Step five: Make a shutter flap out out of folded tape or card that acts as a shutter. Attach it to the out side of the tin, making sure if covers the pinhole fully. Step six: In a dark room cut a piece of photographic paper that will fit inside of your tin. Use a small piece of tape to stick it of the opposite side of the tin that the pinhole. Place your lid back on and close the shutter. Step seven: Point the camera towards the object you want to capture (preferably somewhere it is secure and won't move) Open the shutter for a few seconds or minuets deepening on the about of sunlight. Step eight: Once you have closed the shutter take it back to the dark room and carefully remove the photographic paper. Place it in: Developer (1 minute), Fixative (around 5 minutes), wash with water and then hang. Step nine: Once your paper has been hung and is dry, scan the negative and using photoshop invert the image to positive. Now your finished! |


|
Steven Pippin.


These photos are taken by Steven Pippin using a pinhole camera. Steven pippin’s fascination with mechanics and physics led him to experimenting with many photographic techniques, so pinhole photography became a strong interest of his. His most famous pinhole photography is called Laundromat Locomotion where he turned a row of washing machines into a series of pinhole cameras which where triggered by trip wires. He then rode a horse though the laundromat to show the horse in motion and then walked across doing the same thing. This then produced a sequence of photo’s:
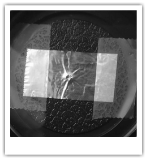
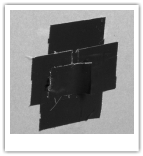
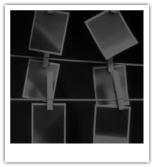
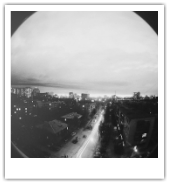
Here are some images I took using a pinhole camera:
|
|
These where the set of photos I took using the pinhole camera I made. Some of my photos didn't work because at first I didn't know how long the exposure time should be so they where either under exposed or over exposed. After trying multiple times I worked out I should expose my camera for about 5 seconds. These where the few images that worked: |
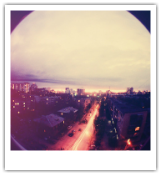
Favourite image

|
This was my favourite image that I took using a pinhole camera. After having tried multiple times I finally found that right amount of time to expose the image and create a quite successful photo. I quite like the fact that it isn't perfect, for example the blurred black border surrounding the image seems quite effective as it create a border for the main subject, the tree, and gives the effect of actually looking through a pinhole camera yourself. I also think that the tree was a good main subject as all the small black branches contrast well with the white background. However it could be improved as everything at the bottom half of the image did not show up, so it may have been slightly over exposed. Also at the left hand side there are a few white lines, possibly from inside of the pinhole camera. Overall I am very happy with this outcome.
|
