Year 11 Mock Exam: Food + Drink.

Pinterest-Food + Drink
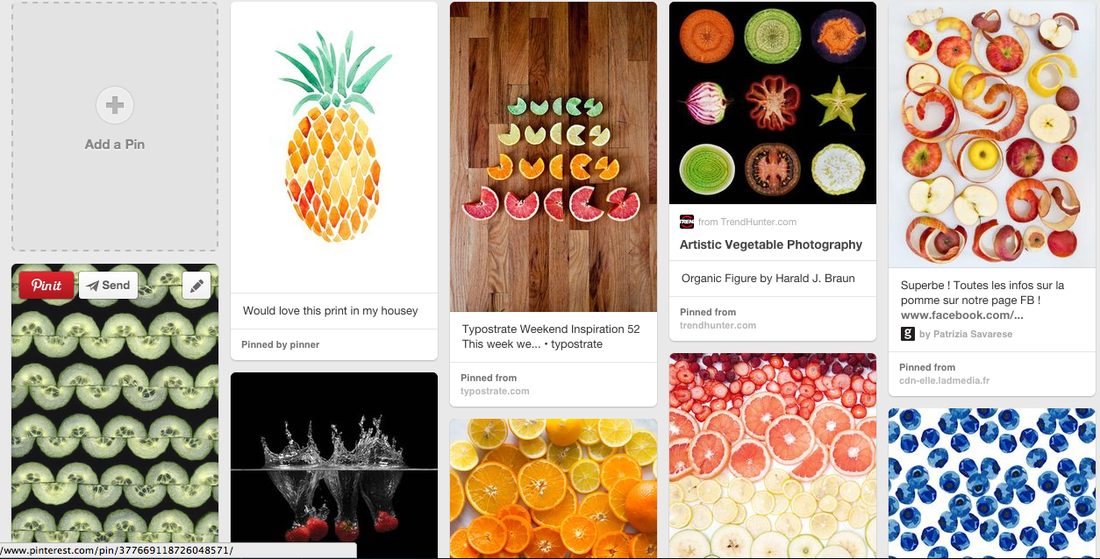
I have made a Pinterest account and created a board of ideas for my Year 11 mock exam. I am going to continue adding images to this account and get ideas for my final piece . To visit my Pinterest click on the image on the below.
Angela Easterling
-natural photograms-

|
Angela Easterling has a unique style of photography having been influenced by Fox Talbot, and the botanist/photographer Anna Atkins. She does not use a camera to create her images, but using light sensitive paper, the right light source and intensity. The fruits and vegetables then make their own particular and unique colour making each image completely different. I want to try and make my own representation of these images using different organic materials. Im really interested in the different colours that are created. I also like the idea of not using a camera to take these images and how you can clearly see the outline but also the interesting pattern within the fruits.
|

|
My Representations
- Chemigrams-


These are the chemigrams that I attempted to make. I used light sensitive paper to place my different fruit and vegetables on, and I then left them in an area where they where exposed to light. I am pleased with how they turned out as I like the different colours that were created, however I wanted the different patterns with in the the fruit to be more prominent and obvious so that it was clear what fruit or vegetable I had used.
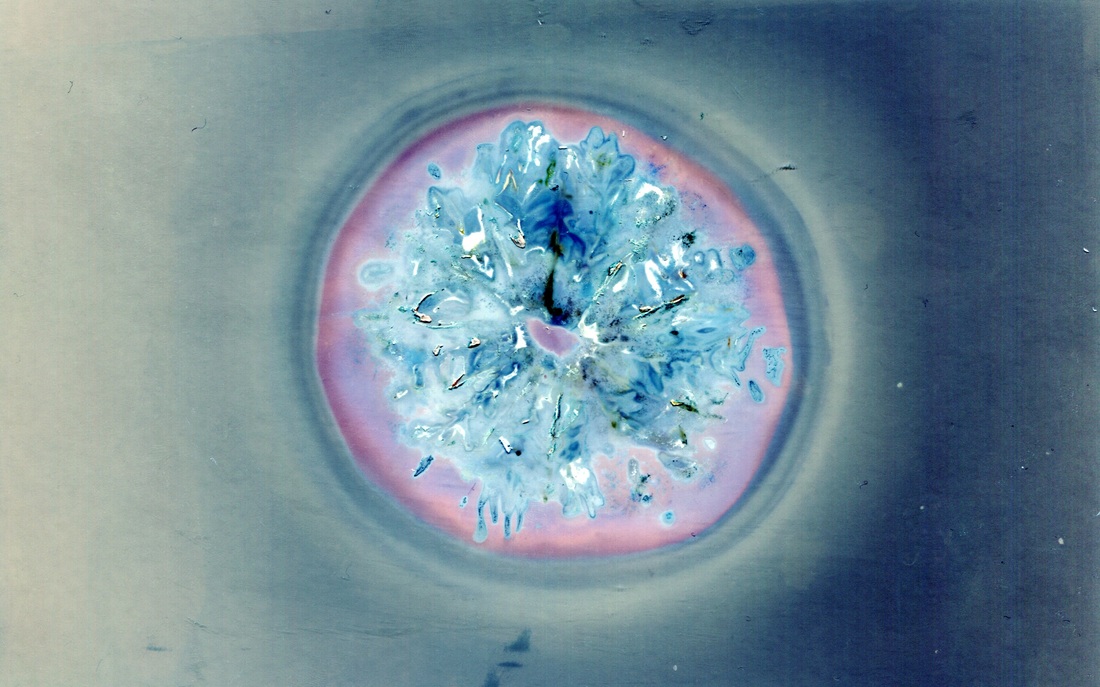
After first scanning them they where left to be further exposed to more light and you can see the difference as the fruit began to mould:
After first scanning them they where left to be further exposed to more light and you can see the difference as the fruit began to mould:
Before
|
After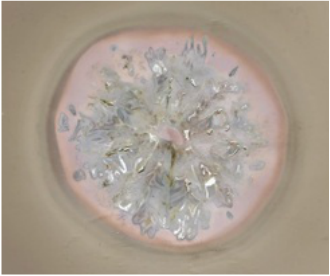
|
I don't know which one I prefer because in the second scanning the pattern within the fruit is much clearer and I like the darker colours created in the middle. However the outline of the fruit is less obvious than the first scan. I thought the bold outline was really interesting and created an effective border around the fruit. Also I liked the light pink colour created in the middle of the fruit in the first scan.
Camera-less photographers.
For my final piece and theme I don't want to use a camera, So I wanted research other camera-less photograohers and see there different styles and ideas.
|
Floris Neusüss. Floris Neusüss work is completely based around studying and making photograms. He makes whole body photograms which he first exhibited in the 1960's he has consistently explored the photograms numerous technical, conceptual and visual possibilities. His work is based around the human body and the different shapes and shadows it can cast. Here is some of his work-> |
Garry Fabian Miller. Garry Fabian Miller creates glowing abstract photographs by casting shadows, or blocking and filtering light on photographic paper in a dark room. He gets his inspiration by walking on dartmoor, the location of his home. He likes to walk along dramatic landscapes to help him create his work. I like the solid black backgrounds in his work against the bright bold shaped created in the centre. Here is some of his work <- |
Photogram/ Rayograms.
-set#1-
-To Learn more about Photograms CLICK HEAR-
After experimenting with chemigrams I decided to try and make photograms. I used pinterest to find some new ideas about how to photograph different fruit and vegetables. I found these images and really liked how they showed the inside of the fruit and not just the outside.
So.. I decided to do my own representations of these images.
I wanted to continue the theme of showing the inside of the fruit and all the patterns and deferent shapes created inside, I also didn't want to use a camera because I think chemigrams and photographs are the most effective and interesting way of showing fruit and vegetables rather than just taking a photo using a camera. I found these photograms really effective. I love the solid black background against the bold white shapes of the fruit and vegetables. Also like how the insides of them are more of a grey colour making the patterns also stand out.
I wanted to continue the theme of showing the inside of the fruit and all the patterns and deferent shapes created inside, I also didn't want to use a camera because I think chemigrams and photographs are the most effective and interesting way of showing fruit and vegetables rather than just taking a photo using a camera. I found these photograms really effective. I love the solid black background against the bold white shapes of the fruit and vegetables. Also like how the insides of them are more of a grey colour making the patterns also stand out.


|
My Favourite:
|
Photograms/Rayograms.
-set #2-
This was my second set of photograms. Here I used a grapefruit, a tomato and a kiwi. For these fruit it took a couple of tries to work out the right exposure time, so a lot of the pictures turned out over exposed and didn't show the patterns inside the fruit and only bold shapes. However I like how some of them turned out, like the tomato, I like how the outline isn't a perfect circle and how bold the shape was against the solid black background.


Photogram/Rayograms: FINAL PIECES.
-Set #3-
When I began to scan some of the photograms/ rayograms and some of the different chemigrams that I had made, they accidentally turned out like this. When scanning them, the person who previously was using the computer had changed the colour settings to inverse, which explained the dramatic colour change. I like the fact that they resemble bacteria in a petri-dish, and how they have all created unique colours and bold outlines.I think this accident was really effective and I love how they turned out.


Display Ideas.
|
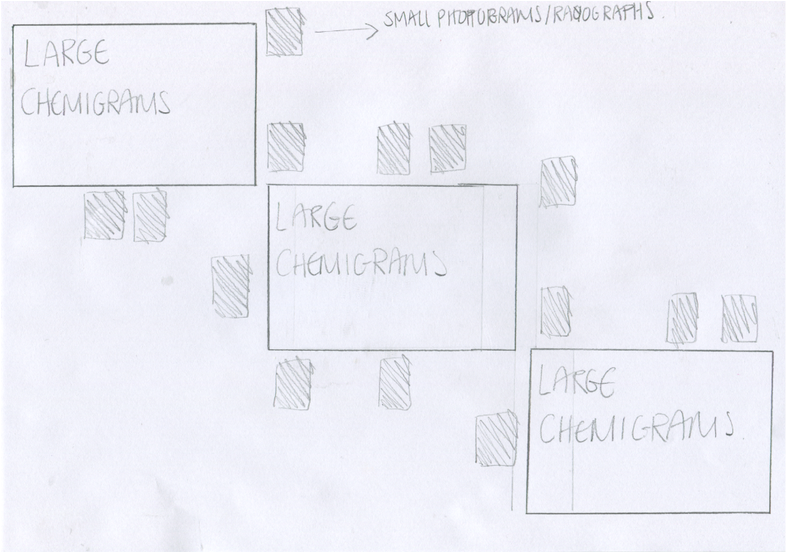
The Bright, contrasting colours really make them stand out and I am planning on displaying them on a very large scale. I think displaying them quite big will be the most effective way to be able to see the patterns with in the fruit. I was also planning on hanging them from the celling and not attaching them to a flat wall.
I also want to displaying all of the photograms and chemigrams that I made around the large chemigrams, and I was planning on also hanging them from the celling, but behind and then bellow the large final pieces. As shown in these pictures they will be quite a lot smaller than the large chemigrams, but I want to show the mass of images that I made before finally making my final pieces. |
|
My final display idea:
I decided that it would be quite difficult to hang all of the images from the celling, but I still like the idea of having all of the original, small photograms, chemigrams and cyanotypes surrounding the larger images: